Last month we received a question from a number of readers about how to prevent mold growth on shower caulking. If you’ve ever been dismayed by the sight of mold creeping along your shower caulking, you’re not alone. Mold growth on shower caulking is a common issue that can not only be unsightly but also pose health risks to you and your family.
In this post, we’ll delve into effective strategies and expert tips for keeping mold at bay and maintaining clean, mold-free caulking in your shower. Whether you’re a seasoned homeowner or a first-time renter, this guide will equip you with the knowledge and tools you need to tackle mold prevention like a pro.
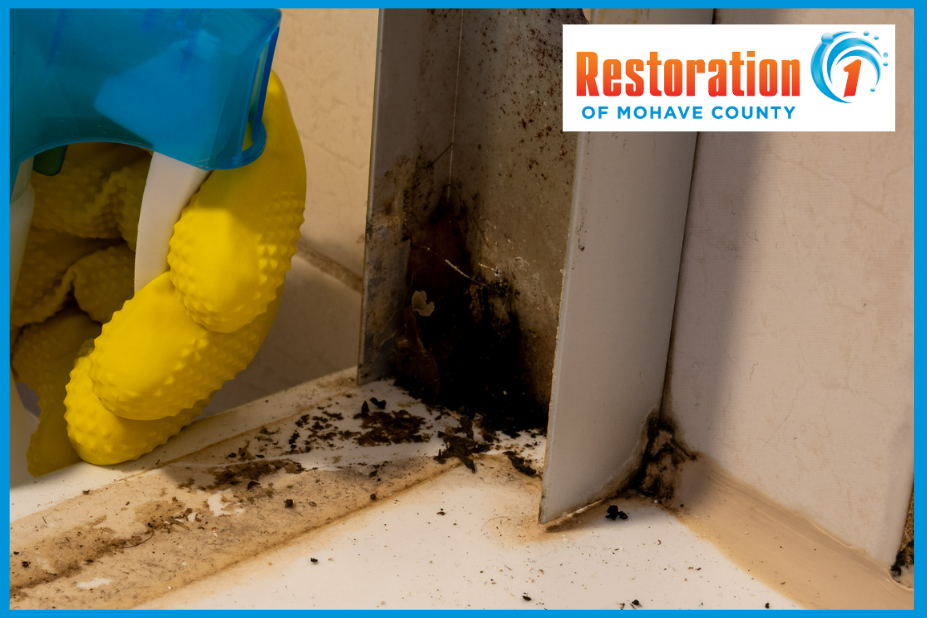
To prevent mold growth on your shower caulking, we recommend implementing the following tips:
Regular Cleaning: Establish a routine cleaning schedule for your bathroom, paying special attention to the shower area. Use mildew-resistant cleaners or homemade solutions to remove soap scum, dirt, and grime from the caulking and surrounding surfaces.
Here’s a great cleaning protocol to try:
WARNING! Frequent use of these solutions and many store products can damage and wear away your caulk and shorten its lifespan, making replacement necessary far sooner than expected. If the mold has penetrated too deep into the caulk, then removing and replacing it may be necessary.
Before you do anything – we recommend you set up a HEPA air filtration system and contain the area you are cleaning. Mold spores travel!
1. Use – straight!
… and pour it into a spray bottle. Be sure to open windows or use other ventilation. You should also wear eye protection, breathing apparatus, and rubber gloves.
2. Spray your shower caulk with the solution, liberally covering all affected areas.
3. Let soak for at least five minutes.
4. Gently scrub the caulk with a sponge or soft bristled brush and then wipe it with a clean wet cloth.
5. Dry your shower tile and grout with a soft towel.
Adequate Ventilation: Proper ventilation is essential for reducing moisture buildup in the bathroom. Ensure your bathroom is equipped with a ventilation fan or window to facilitate air circulation and minimize humidity levels, especially after showering.
Prompt Repairs: Address any leaks or water damage in your bathroom promptly. Inspect the caulking regularly for signs of wear or deterioration and repair or replace it as needed to prevent water infiltration behind the tiles.
Silicone Caulking: Consider using silicone-based caulking for your shower, as it is more resistant to mold and mildew growth than traditional grout or acrylic caulking. Silicone caulking forms a waterproof seal that inhibits moisture penetration and reduces the risk of mold formation.
Drying Surfaces: After showering, wipe down the shower walls, caulking, and fixtures with a squeegee or dry cloth to remove excess moisture. Keeping surfaces dry and free of standing water helps prevent mold from taking hold.
Regular Inspections: Conduct periodic inspections of your bathroom to identify any potential mold hotspots or moisture issues. Addressing problems early can help prevent mold growth and mitigate the need for extensive remediation down the line.
By incorporating these preventive measures into your bathroom maintenance routine, you can effectively minimize the risk of mold growth on your shower caulking and enjoy a clean, healthy living environment.
Ready to reclaim your home from the clutches of mold? Don’t let it linger any longer! Contact Restoration 1 of Mohave County today for expert mold removal services. Our team is here to restore your peace of mind and the safety of your home. Say goodbye to mold and hello to a healthier living environment. Reach out now and let’s get started on your journey to a mold-free home!